
Automating Romanian Sauerkraut / Sour Cabbage / Varza Murata
Welcome to my first non-work related article and to my curiosity of building an automated installation for making sour cabbage. To those that never came across this, it’s what we use you in Romania for 2 purposes:
- making minced meat rolls we call “sarmale” (the Turkish call them sarma and the Greeks dolma)
(spoiler alert:Sarmale) - making sour soups we call “ciorba” or bors (do not confuse with the Russian borsh that despite sounding the same is a completely different dish)
The sour juice resulting from the fermentation you can also drink on empty stomach. Beware though..depending on your stomach you might feel that you are getting purged :)
Short story
The way we prepare sour cabbage in Romania assumes that:
- you buy quite a good number of cabbage (In my case I had around 15-20)
- those you arrange in a barel of 60l
- you have 1 x dried Dill Plant (not what you find in shops, you need the fully grown and dried one; it requres to have the “flowers” with seeds as those contribute to the aroma)
- you split this plant into two parts, one part you put on the bottom of the barrel
- you buy Salt that DOES NOT contain iod
- you boil enough liters of water to narrowly cover the cabbage in the barel
- in each liter you add 1 x tablespoon (you put enough salt in it .. that it looks like a mountain peak:) ) of salt
- you put the water in the barrel to cover the cabbage
- you put the other half of the dill plant on top
- you put some wood with a weight (full water bottle for example) on top to keep the wood pushing the cabbage that might float upward under water
During a process that can last anywhere between 1-2 months you must 2-3 times per week either:
- blow through a hose in the salty water mixture OR
- remove the liquid and then put it back in (oxygenating it as a result)
In my case:
- I used instead of food + some filled up water bottle a granite stone (it was already weighing 5-6 kg and granite is not getting corroded by the salty water)
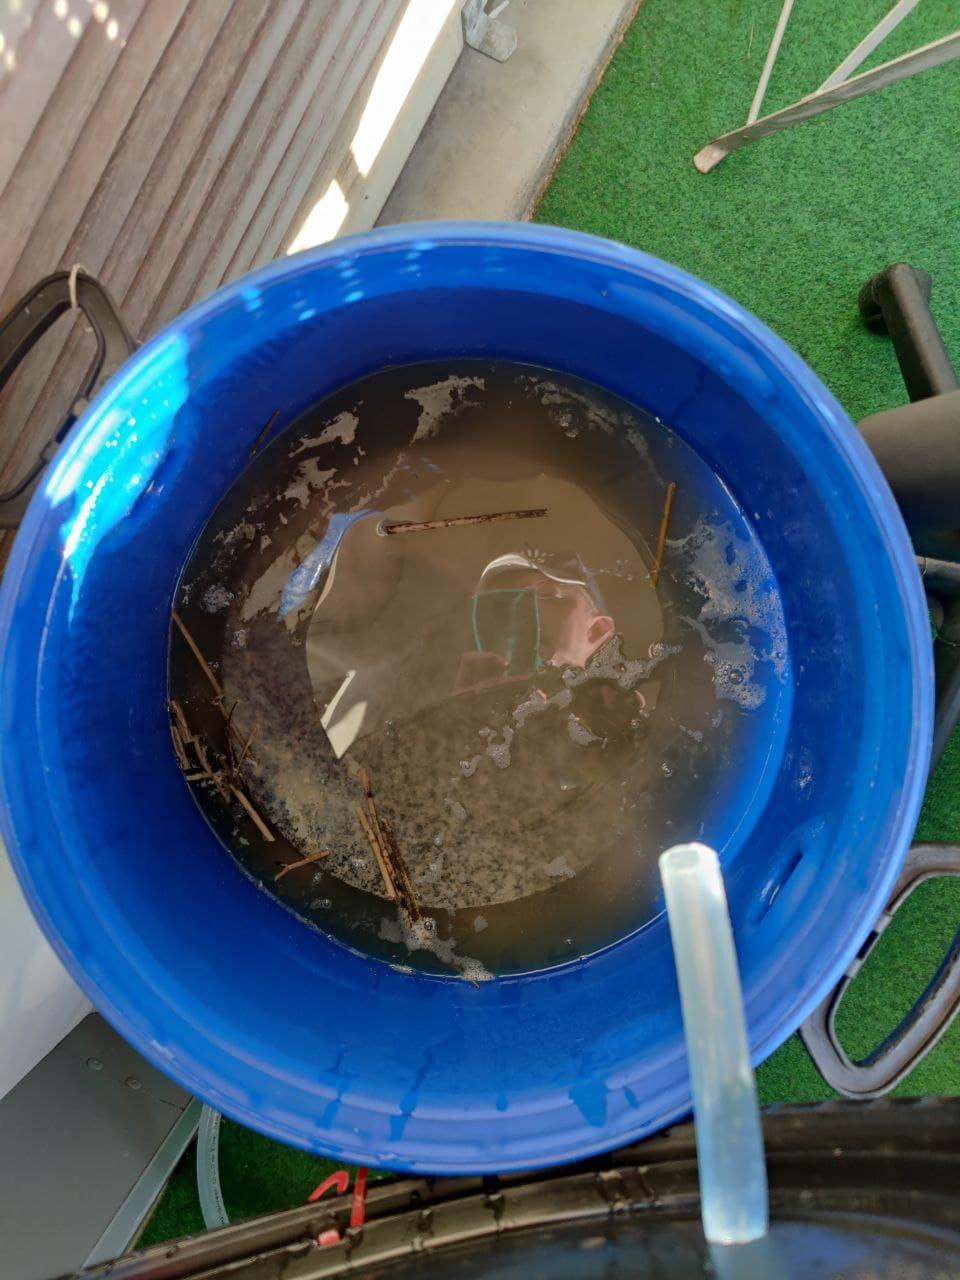
- I used a pump to periodically get the liquid out, then back into the barrel while keeping in mind that on the upper part of the barrel there is a layer of air (my liquid for 15-20 cabbages fills just half of the barrel)
What is needed for the whole installation
Good will and perseverence :). You also need to be stubborn and a bit crazy.
Components
List of required components:
- Water Tank (like those used by houses to gather rain water)
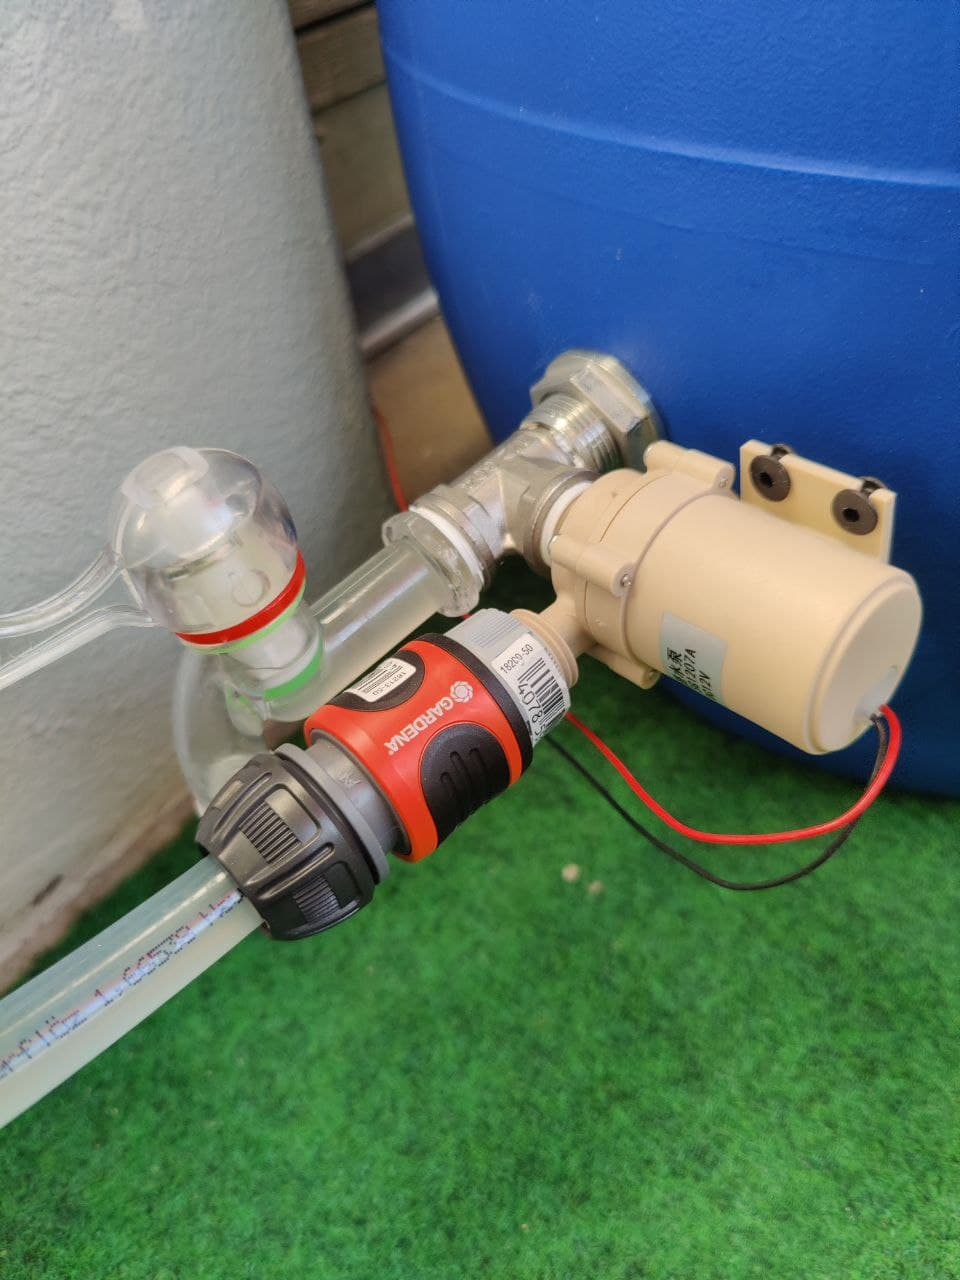
Water Tank 60l - Water filter (goes inside barrel, prevents that salty water with dill plant remains cloggs the pump)
Water Filter 1/2 inch connector - Barrel Connector
On one side you put the filter, on the other the next component that will be a splitter.
Connector 1/2 inch - Splitter
One part of the sour liquid will go to a tap, the other one to a sillicon hose that will bring it back into the barrel via the upper side / cover.
Splitter 1/2 inch - Water pump
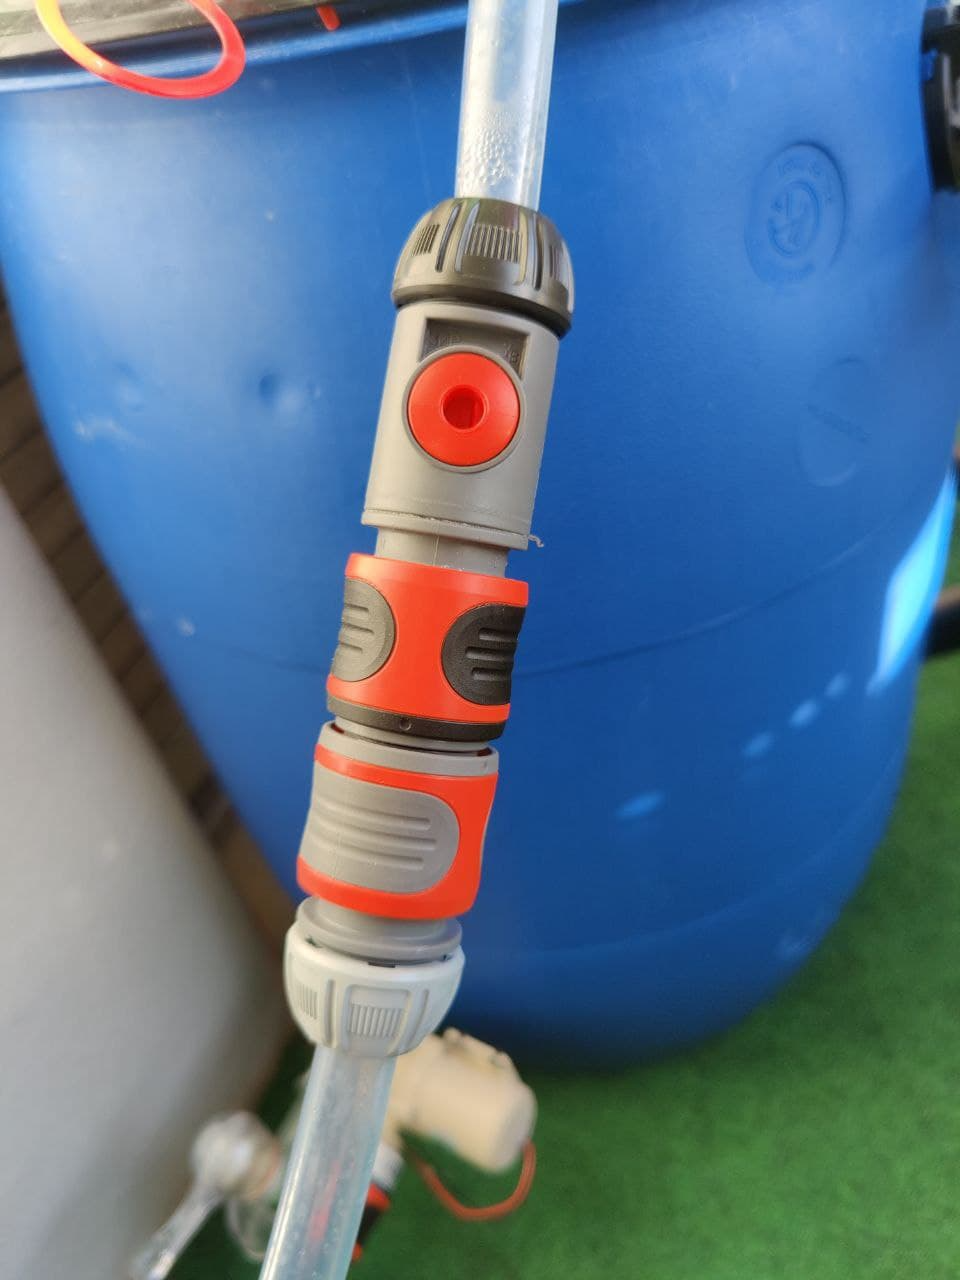
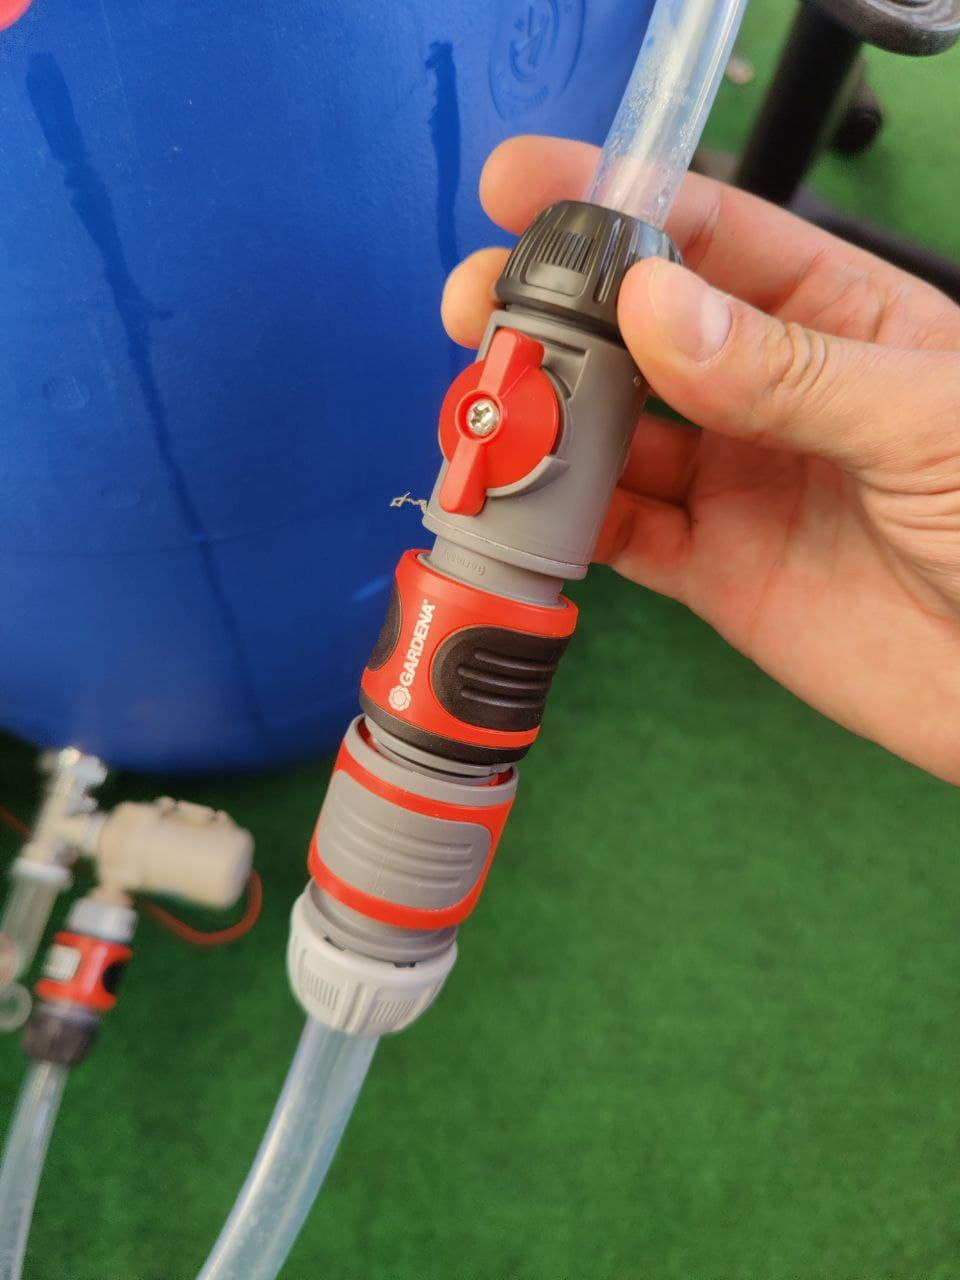
Pump 1/2 inch - Garden accessories I could not find a product ID online to show you these but any gardening store will have them. They are manufactured by Gardena but any other type / brand will do. In my case I installed a 2 parts system here as I wanted (aside from the tap) to have the possibility to also disconnect the installation here and pump the liquid directly into a bottle. This is a bit redundant given that I already have a tap but I was not sure which solution would be the best so I decided to have them both.
- Granite stone to keep the cabbage under water level
This one weighs about 6 kg so don’t do like I did..don’t go with a backpack to carry it if you don’t want to build up back muscles.
My barrel has a diameter of about 34-35 cm.
The stone has a diameter of about 30 cm and a height of 3 cm.
Granite stone 30 cm - Water tap
This is the easiest one to find at any department store.
Tap 1/2 inch - Silicone hose for circulating the salty water out and back into the barrel
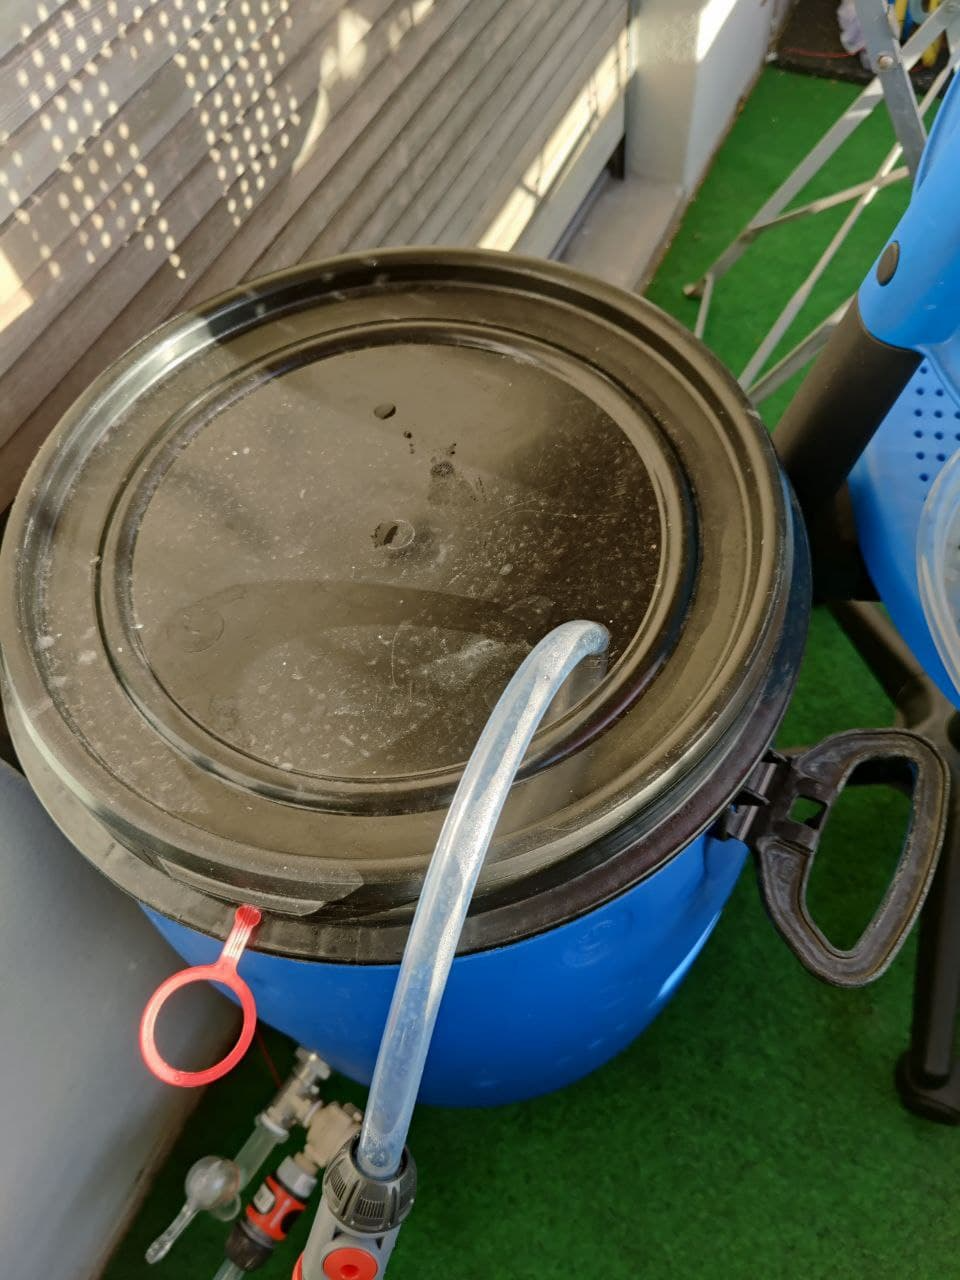
On the upper part of the barrel, the cover, I just drilled a hole, did not do anything fancy and inserted the silicone hose through it.
Components Pictures
Silicone Hose


Granite stone

Water tap and pump

Gardening connectors


Putting it all together
IT parts / automation
Following are needed for bringing the project to life in a Frankenstein fashion:
- Raspberry PI + charger for it
And the wires that connect to the pump (one comes from the pump charger, the other - the + - from the relay board).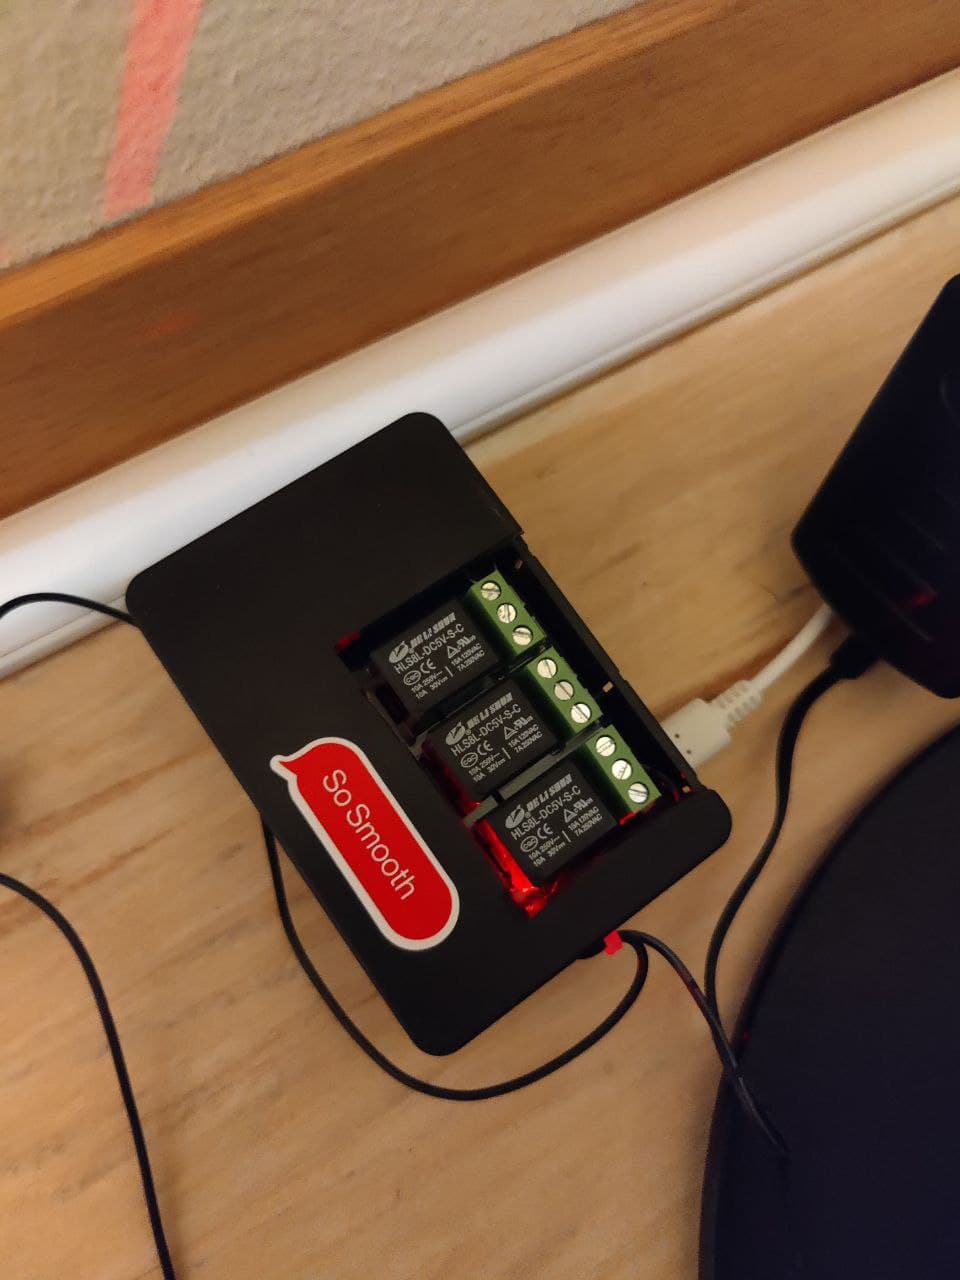 I bought a Raspberry PI 4 with 4GB RAM but any would do. The wires you see are from the pump charger (the 5V + goes via the Raspberry relay)
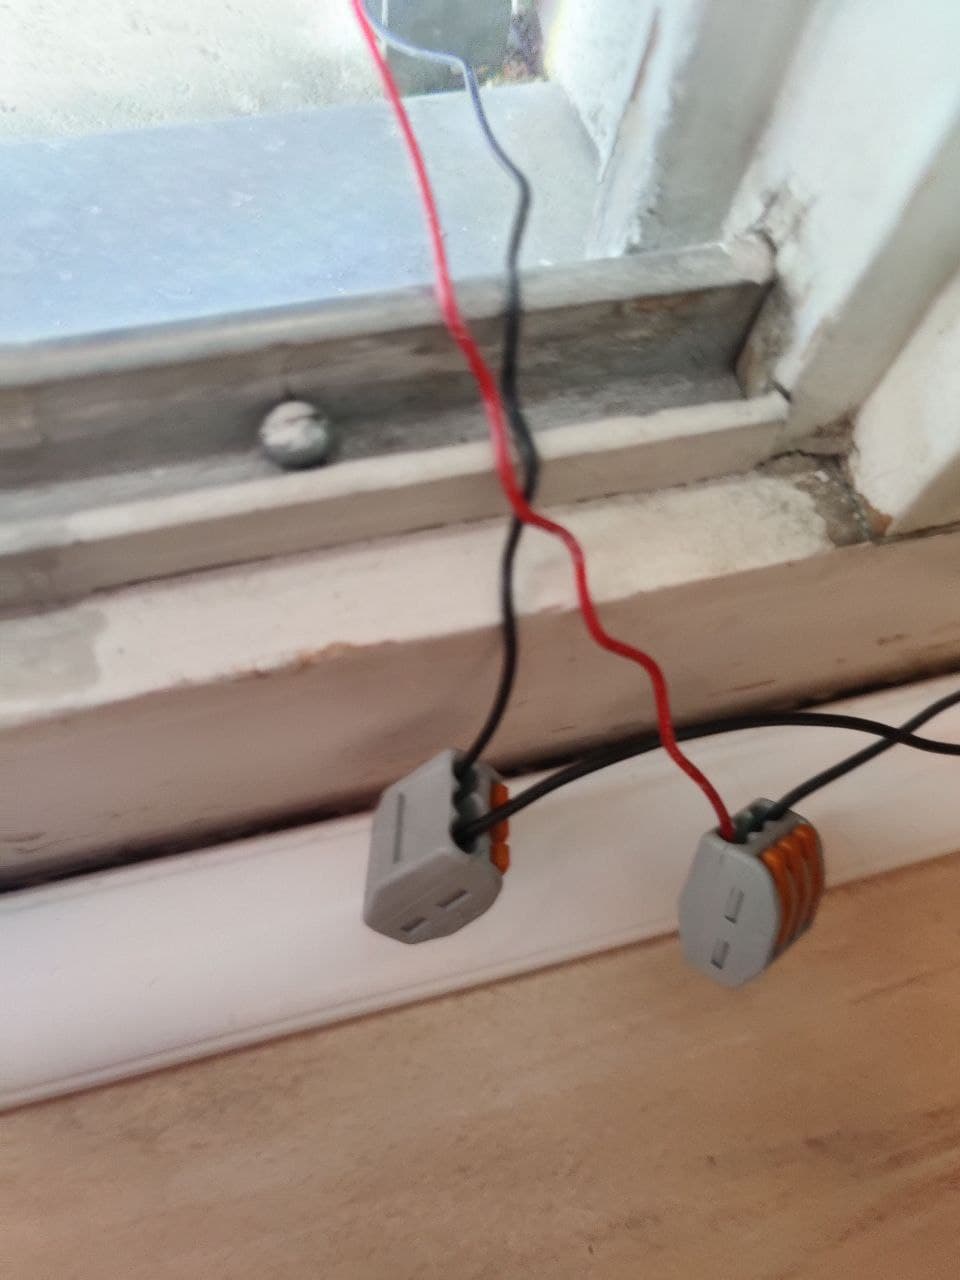
- Raspberry PI 4 Case
The one I bought and got recommended by the shop was a bust.
The seller did not read anything about how much space the PI + the Relay board would eat up.
As such I ended up having to cut through it.
See the picture and that the Relay Board is sitting directly outside.
The case would not close as a result of having installed the board. - Raspberry PI Relay Board
Relay Board - 5V Charger for the pump
I used a generic one I had from a SOHO router around the house.
I did not find specs for amps on the aliexpress page or for power but reading the comments I figured out what others were using.The “+” wire of the charger connects via one of the relays on the Raspberry PI Relay Board.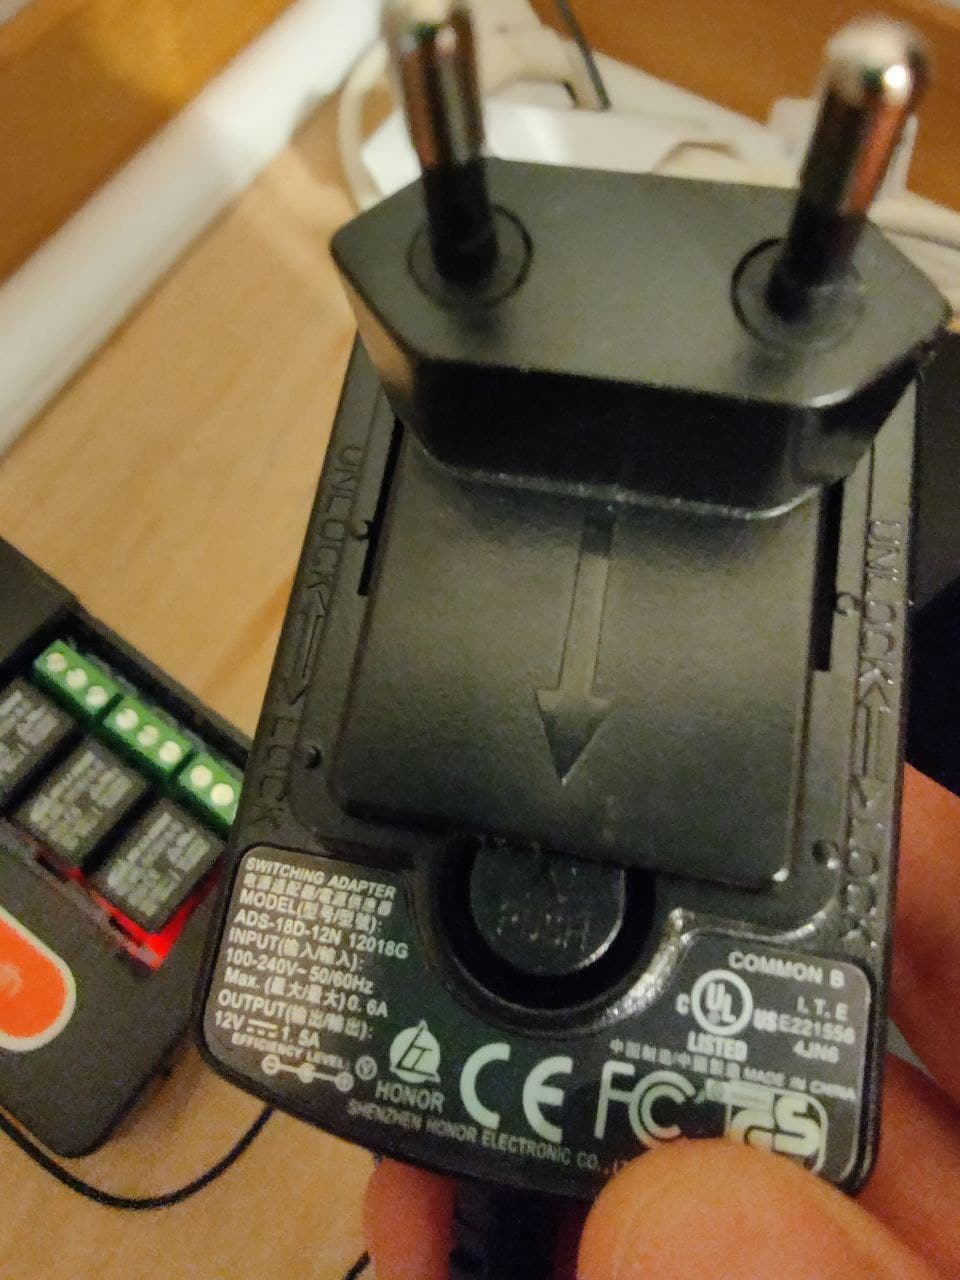
The docs of the Relay Board were specifying which GPIO corresponds to triggering which relay (the board has 3 relays and I use just one).
This info was needed in the Home Automation software (Home Assistant) for periodically powering up the pump to oxygenate the salty water.
Connecting all of this
The Raspberry PI 4 has the Relay Board installed on top of it and it in turn sits in a case.
The charger for the Pump has the 5V + wire going via one of the Relays on the Raspberry PI 4.
On the Raspbery PI4 there is Home Assistant for automation.
Two times a week I scheduled it to get the liquid out and put it back in through the top of the barrel.
Home assistant configuration
With the mechanics out of the way time to see how to have all this self triggering.
After investigating the available automation software on PI4 I decided as a result of the reviews and logical structure to stick with Home Assistant .
I could have used Domoticz and googling revealed a ton of others but this was my choice and I stand by it.
My first disappointment was that there is no easy, straightforward tutorial about Home Assistant so no matter what you do, you are stuck with reading about it.
There are two major ways of installing it:
- as a container in an existing OS (e.g. The Raspbian OS that you can easily install on the Raspberry)
- as a standalone OS
I chose the latter as then it comes also with a management interface for the starting/stopping of it BUT MOST IMPORTANT with the possibility to easily install addons.
There are 2 x addons that I will investigate in the future but for now not needed:
- NodeRed
You make a nice visual drawing with what event triggers another and define chaining. This is much easier than the native Home Assistant way. - AppDaemon
This one allows you to define in a Python manner what activity triggers another so again a different way of doing things vs the YAML definitions of Home Assistant.
Theory and what I needed to configure:
-
Install Home Assistant Procedure is quite simple, documented and it involves an image burner software and the micro SD-Card of the Raspberry PI.
-
Install SSH addon for Home Assistant
SSH -
Create a switch in configuration.yaml
The switch is an entity that does exactly what the name says.
It sends a Signal to a GPIO pin and thus triggers our PUMP RELAY ON/OFF.switch: - platform: rpi_gpio invert_logic: true ports: 21: Varza - platform: mystrom host: 172.16.10.137 name: Priza1 -
Create a script in scripts.yaml that triggers the switch
The script accepts parameters such as the time you want the PUMP to run.
When the script triggers it does 3 x actions in successive order:- trigger the PUMP relay
- wait XXX time (defined via calling parameter)
- stop the PUMP relay
agita_varza: alias: "Agita Varza cu putere" icon: "mdi:party-popper" description: "Turn the pump on to give oxygen to the cabbage" variables: entvarza: switch.varza minutes: 1 fields: minutes: description: "For how many minutes to circulate the salty water" example: 5 entvarza: description: "Which pump for which barrel to turn on" example: "switch.varza" mode: restart sequence: - alias: "Agita Varza" service: switch.turn_on target: entity_id: "{{ entvarza }}" - delay: # supports seconds, milliseconds, minutes, hours minutes: "{{ minutes }}" - alias: "Calmeaza varza" service: switch.turn_off target: entity_id: "{{ entvarza }}" -
Either create an automation (not 100% my case but needed in the background)
This one would also be a text / yaml definition that calls the SCRIPT at predefined intervals. -
Use a dashboard concept to choose the days and hour when to have the PUMP running
I used an alarm clock dashboard widget where you could set an alarm on various days at a certain time.
Instead of an alarm though, I am triggering the script with the part. The alarm clock is done via lovelaci-ui.yml or easier -> edit the yaml code from Home Assistant GUI -> Configure -> Lovelace Dashboard. The dashboard depending on which days and time you select will populate boolean values (waketime / wakestatus / etc) and the code in automations.yml will check if those are set to determine whether to run the script or not (script that in turn acts on the switch, on, 5 min, off).type: vertical-stack cards: - type: entities entities: - entity: input_boolean.wakestatus_1 name: Mode - entity: sensor.wake_time_1 name: Wake Time - entity: input_number.wakehour_1 - entity: input_number.wakeminutes_1 title: Make the Sour Cabbage happen show_header_toggle: false header: type: picture image: http://172.16.10.130:8123/local/varzabutoi.jpg tap_action: action: none hold_action: action: none - type: horizontal-stack cards: - type: button tap_action: action: toggle hold_action: action: none show_icon: true show_name: true entity: input_boolean.wakeweekday_sun_1 name: Sun icon_height: 40px - type: button tap_action: action: toggle hold_action: action: none show_icon: true show_name: true entity: input_boolean.wakeweekday_mon_1 name: Mon icon_height: 40px - type: button tap_action: action: toggle hold_action: action: none show_icon: true show_name: true entity: input_boolean.wakeweekday_tue_1 name: Tue icon_height: 40px - type: button tap_action: action: toggle hold_action: action: none show_icon: true show_name: true entity: input_boolean.wakeweekday_wed_1 name: Wed icon_height: 40px - type: button tap_action: action: toggle hold_action: action: none show_icon: true show_name: true entity: input_boolean.wakeweekday_thu_1 name: Thu icon_height: 40px - type: button tap_action: action: toggle hold_action: action: none show_icon: true show_name: true entity: input_boolean.wakeweekday_fri_1 name: Fri icon_height: 40px - type: button tap_action: action: toggle hold_action: action: none show_icon: true show_name: true entity: input_boolean.wakeweekday_sat_1 name: Sat icon_height: 40px -
I did use here finally an automation It checks if the day today matches the alarm clock day set as variable via the GUI part above.
It checks if the hour matches.
If it does, then it triggers the PUMP switch. -
Full configs of Home Assistant
-
configuration.yaml
# Configure a default setup of Home Assistant (frontend, api, etc) default_config: # Text to speech tts: - platform: google_translate group: !include groups.yaml automation: !include automations.yaml script: !include scripts.yaml scene: !include scenes.yaml homeassistant: customize: !include customize.yaml switch: - platform: rpi_gpio invert_logic: true ports: 21: Varza - platform: mystrom host: 172.16.10.137 name: Priza1 sensor: - platform: template sensors: power: friendly_name: "priza1 consumption" unit_of_measurement: "W" value_template: "{{ state_attr('switch.priza_1', 'current_power_w') }}" wake_time_1: friendly_name: 'Start the Varza 1' value_template: "{{'{:02d}:{:02d}'.format(states('input_number.wakehour_1') | int, states('input_number.wakeminutes_1') | int) }}" - platform: time_date display_options: - 'time' - platform: mitemp_bt mac: "58:2D:34:3A:16:35" name: Sufragerie force_update: true median: 1 monitored_conditions: - temperature - humidity - battery - platform: mitemp_bt mac: "58:2D:34:3A:15:A6" name: Dormitor force_update: true median: 1 monitored_conditions: - temperature - humidity - battery # Alarm clock for triggering Varza input_boolean: wakestatus_1: name: Varza 1 Periodicity icon: mdi:alarm wakeweekday_mon_1: name: Monday icon: mdi:calendar wakeweekday_tue_1: name: Tuesday icon: mdi:calendar wakeweekday_wed_1: name: Wednesday icon: mdi:calendar wakeweekday_thu_1: name: Thursday icon: mdi:calendar wakeweekday_fri_1: name: Friday icon: mdi:calendar wakeweekday_sat_1: name: Saturday icon: mdi:calendar wakeweekday_sun_1: name: Sunday icon: mdi:calendar # input hour and minutes input_number: wakehour_1: name: Hour min: 00 max: 23 step: 1 icon: mdi:alarm wakeminutes_1: name: Minutes min: 00 max: 59 step: 1 -
scripts.yaml
Triggers the switch for the relay on/off for the PUMP.agita_varza: alias: "Agita Varza cu putere" icon: "mdi:party-popper" description: "Turn the pump on to give oxygen to the cabbage" variables: entvarza: switch.varza minutes: 1 fields: minutes: description: "For how many minutes to circulate the salty water" example: 5 entvarza: description: "Which pump for which barrel to turn on" example: "switch.varza" mode: restart sequence: - alias: "Agita Varza" service: switch.turn_on target: entity_id: "{{ entvarza }}" - delay: # supports seconds, milliseconds, minutes, hours minutes: "{{ minutes }}" - alias: "Calmeaza varza" service: switch.turn_off target: entity_id: "{{ entvarza }}" -
automations.yaml
config $ cat automations.yaml
- id: 'oxigeneaza_varza_1'
  alias: Oxigeneaza Varza 1
  trigger:
    platform: template
    value_template: "{{ states('sensor.time') == states('sensor.wake_time_1') }}"
  condition:
    condition: template
    value_template: >
      {% set today = 'input_boolean.wakeweekday_' ~ now().strftime("%a") | lower ~ '_1' %}
      {{ is_state('input_boolean.wakestatus_1', 'on') and is_state(today, 'on') }}
  action:
    service: script.turn_on
    target:
      entity_id: script.agita_varza
    data:
      variables:
        minutes: 5
        entvarza: switch.varza
-
How it looks
